
Sample Radio Net Editor
The following steps will be used to create a radio net from the Radio Net Editor.
Step 1: Open the Radio Net Editor window.
Step 2: Click add button to add a new radio net.
Step 3: Enter a name for the radio net and save. Right click on any node to rename it or remove it, or to add any sub stations to it.
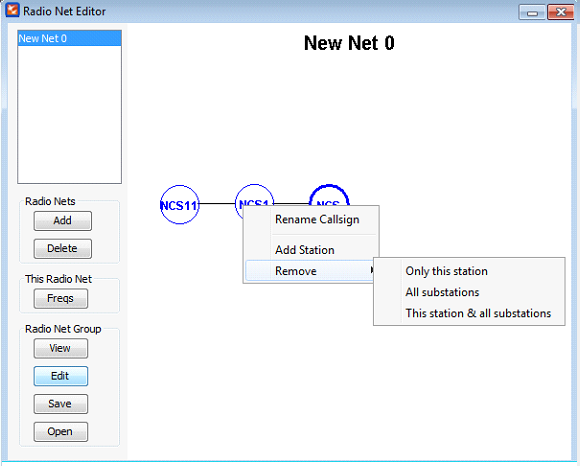
∆ Image 24e: Radio Net Editor |
Step 4: Click “Freqs” button to add frequencies to the radio net.
Step 5: Add primary frequency value and alternate frequency value in the radio net frequency window, and then save.

∆ Image 24f: Radio Net Editor Freqs |
Step 6: Click “Edit” button and add callsigns for observers as follows;
b0A
*R1
*R2
*R3
Step 7: Add callsigns for gun line as follows.
*R0
**10
**20
**30
Click “Save” button when done.
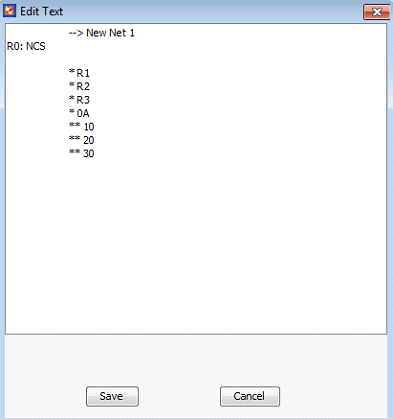
∆ Image 24g: Edit Text |
Step 8: Click the “View” button to view the added frequencies and call signs
Step 9: Click the “Save” button and save as “radioNets.dat”.
Step 10: Click the “Open” button to open the created radio net.
Step 11: Click the “Edit” to edit the existing radio net.
Step 12: Click “Delete” button to delete the added or existing radio net.